Pasta Party!
For today, I invited two of my best friends over to my house so we could go crazy and make pasta. When I got home from Italy, my Aunt and Uncle gave me the best gift any pasta nut would love...three pasta maker attachments for a kitchen-aid stand mixer. The first rolls out flat sheets of pasta, and the other two cut sheets of pasta into fettuccine and spaghetti noodles. So. Cool.
 So, I figured, what would be better than to invite some buddies over to break them in? Before the two got there, I started some red sauce. I took about a 1/4 cup each of chopped carrot, celery and onion and started to sweat them in about 2 tablespoons of olive oil. I literally used some shredded carrots that you get in the bag to sprinkle on top of a salad. Seriously. Shape just doesn't matter, because once you've reached the consistency you want, you're going to use an immersion blender to blend it to your liking. Then, I added two cloves of sliced (not chopped) garlic when the onions were translucent, and added a teaspoon each of dried rosemary and thyme. Drop in a 1/3 cup of red wine (something you wouldn't mind drinking, don't use crap here) then add two 14.5 oz cans of diced tomatoes.
Yes, canned tomatoes are ok. Look, I don't have good ripe tomatoes right now. My garden just "ain't got no". So, the next best thing is to used canned, which were picked when they were in season, and flash steamed to preserve that flavor. The next best thing. Besides, fresh tomatoes are better eaten when you are sitting on your deck in the shade with some cracked black pepper and coarse salt sprinkled on top. Ok? Ok.
Sorry, I took a side route...I'm back now. So, while the sauce was working, we started on the pasta. Deanna* didn't want to do the cooking, so she volunteered to take some photos while Isabell and I worked. The next few photos you see are her handy work. She's pretty good!
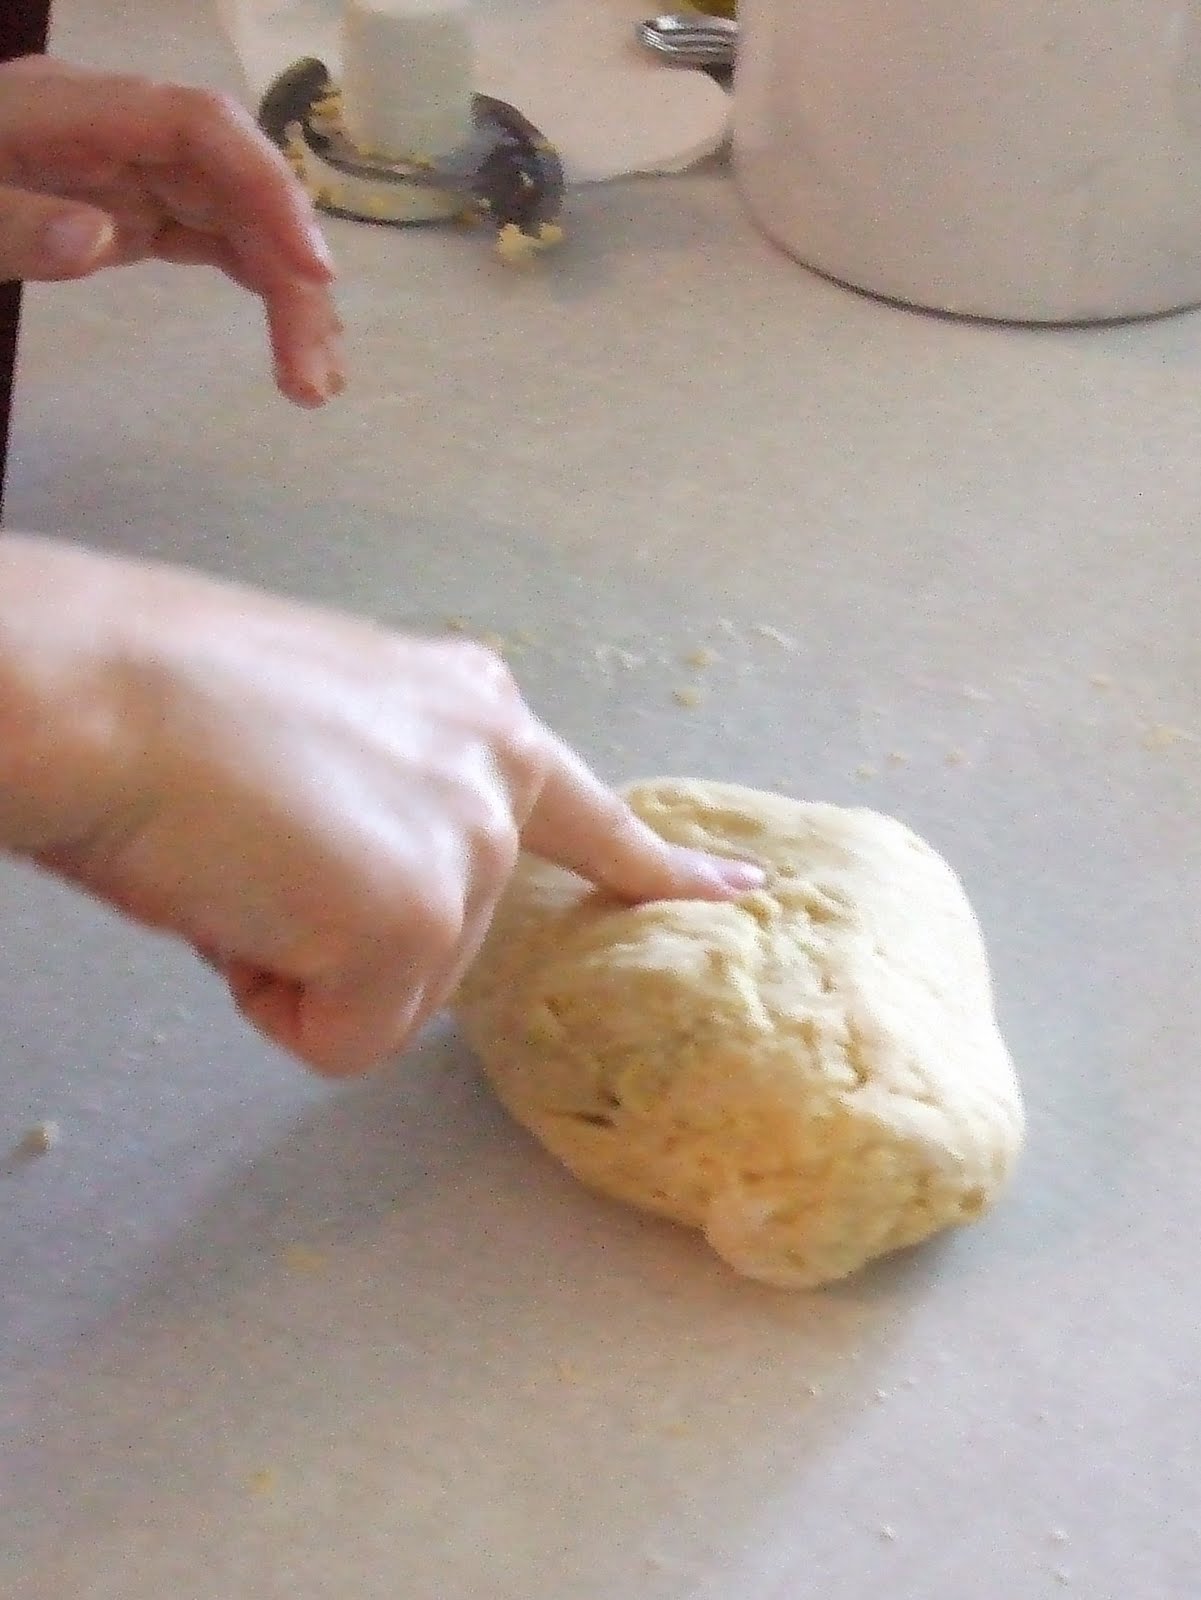
 My Mediterranean Cuisine class at school taught me the easiest and most effective way to make pasta...and it literally couldn't be easier. Three large eggs in a food processor with two cups of flour and a glug of olive oil (yes, a glug is a technical term). Process until it forms into a ball, then lay out on a surface and start to knead until the dough looks nice and smooth. You can also tell by pushing your finger into the dough (as far in as you see mine) and if your finger indent pushes out right away you're good to go. You could let it rest in the fridge for an hour...but that's just more time to screw around. Me, I wanna get my hands dirty right away.
 Cut your pasta dough into quarters and run through the rollers. The largest size on mine is a number 1, so I start there, then fold it in thirds, press it together, and roll it through 1 again. You can repeat this step up to three times or more, if you want...but again, it's just fiddling around and I want to get down to business. From there, I move to 2 and 4 and stop there. Once you get to 4, you might want to cut the pieces in half so they don't get so long that rolling them through becomes a problem. Now go to 6 and finally 7, rolling the dough through each step once. Lay the sheets on a sheet pan, covered with enough flour that the other sheets stacked on top don't stick, and cover the pan with a damp (NOT WET) tea towel to keep everything from drying out while you finish rolling.


 Now comes the fun part. Take one sheet of dough, and lay it out in front of you. (Yes, I'm wearing an apron...yes, I'm ok with that.) Take whatever filling you want (I used chopped roasted button mushrooms with rosemary and thyme and ricotta cheese) and dollop about a teaspoon of filling onto the sheet. Don't do more, it doesn't seem like much but it's plenty. Space each dollop about an inch apart. If you're new at this, do it an inch and a half apart to make it easier on yourself. Make an egg wash (one egg beaten with a teaspoonish of water) and use your finger to make a small square outline around each filling. Then, take the other half of the dough and flip it over to cover the filling. Use your hands and push the air out from around the filling while you close each ravioli. You want to get as much air out as possible so that when you cook them they don't blow up as the heat expands the air inside each ravioli. Don't be meticulous about this, but get as much as you can out. They don't take long to cook because they are fresh, so they shouldn't blow up too much. When they're all nice and snug inside their pasta blankets, use a pizza cutter to cut between each filling. If you want to get fancy, you can use a fork to gently press a design on the outside. Me, I skip it. There really isn't a need to get all fancy. It's just another step, and I kinda like the rough edges. It's homemade, and it should look homemade.
Now you have to worry about making sure your ravioli aren't going to dry out while you finish rolling out and sealing the rest of them. Tricky...but again, if you employ your tea towel sheet pan rig, you should be a.o.k. When you're finished with all of them (and yes, it makes a LOT), you can lay them out on a sheet pan, not overlapping, and freeze. When they're hard, bag and date them and leave in the freezer until you want to use them (for up to 3 months). To use, toss in boiling, salted water when still frozen and cook for 3-4 minutes, or until they float to the top. I usually go about a minute beyond after they float, just to make sure they're heated all the way through.
Want to cook them fresh? Now you're talking! Place them one at a time in the pot and work in batches of no more than 10. When they're finished cooking, toss them straight into that lovely red sauce you made (after blending, of course).

Isabell* and Deanna were really excited about everything we made, and it all came out really well. I even surprised myself, because you know how I feel about futzing around. This process wasn't hard, and I actually found I enjoyed it a lot. Even if you don't have the machinery, ask someone who does if you can borrow it and make it for them. They'd love it, and you wouldn't be stuck trying to eat an entire batch of fresh pasta by yourself. Not that that's a bad thing...
 Give some pasta a try. We made two batches. One for ravioli, and one for fettuccine. They were both delicious, and both totally worth it. I feel like the girls learned a lot, and that we had a blast doing it!
Enjoy your pasta! Ciao!
*Names were changed to protect the innocent! =)
 So, I figured, what would be better than to invite some buddies over to break them in? Before the two got there, I started some red sauce. I took about a 1/4 cup each of chopped carrot, celery and onion and started to sweat them in about 2 tablespoons of olive oil. I literally used some shredded carrots that you get in the bag to sprinkle on top of a salad. Seriously. Shape just doesn't matter, because once you've reached the consistency you want, you're going to use an immersion blender to blend it to your liking. Then, I added two cloves of sliced (not chopped) garlic when the onions were translucent, and added a teaspoon each of dried rosemary and thyme. Drop in a 1/3 cup of red wine (something you wouldn't mind drinking, don't use crap here) then add two 14.5 oz cans of diced tomatoes.
Yes, canned tomatoes are ok. Look, I don't have good ripe tomatoes right now. My garden just "ain't got no". So, the next best thing is to used canned, which were picked when they were in season, and flash steamed to preserve that flavor. The next best thing. Besides, fresh tomatoes are better eaten when you are sitting on your deck in the shade with some cracked black pepper and coarse salt sprinkled on top. Ok? Ok.
Sorry, I took a side route...I'm back now. So, while the sauce was working, we started on the pasta. Deanna* didn't want to do the cooking, so she volunteered to take some photos while Isabell and I worked. The next few photos you see are her handy work. She's pretty good!
 My Mediterranean Cuisine class at school taught me the easiest and most effective way to make pasta...and it literally couldn't be easier. Three large eggs in a food processor with two cups of flour and a glug of olive oil (yes, a glug is a technical term). Process until it forms into a ball, then lay out on a surface and start to knead until the dough looks nice and smooth. You can also tell by pushing your finger into the dough (as far in as you see mine) and if your finger indent pushes out right away you're good to go. You could let it rest in the fridge for an hour...but that's just more time to screw around. Me, I wanna get my hands dirty right away.
 Cut your pasta dough into quarters and run through the rollers. The largest size on mine is a number 1, so I start there, then fold it in thirds, press it together, and roll it through 1 again. You can repeat this step up to three times or more, if you want...but again, it's just fiddling around and I want to get down to business. From there, I move to 2 and 4 and stop there. Once you get to 4, you might want to cut the pieces in half so they don't get so long that rolling them through becomes a problem. Now go to 6 and finally 7, rolling the dough through each step once. Lay the sheets on a sheet pan, covered with enough flour that the other sheets stacked on top don't stick, and cover the pan with a damp (NOT WET) tea towel to keep everything from drying out while you finish rolling.

 Now comes the fun part. Take one sheet of dough, and lay it out in front of you. (Yes, I'm wearing an apron...yes, I'm ok with that.) Take whatever filling you want (I used chopped roasted button mushrooms with rosemary and thyme and ricotta cheese) and dollop about a teaspoon of filling onto the sheet. Don't do more, it doesn't seem like much but it's plenty. Space each dollop about an inch apart. If you're new at this, do it an inch and a half apart to make it easier on yourself. Make an egg wash (one egg beaten with a teaspoonish of water) and use your finger to make a small square outline around each filling. Then, take the other half of the dough and flip it over to cover the filling. Use your hands and push the air out from around the filling while you close each ravioli. You want to get as much air out as possible so that when you cook them they don't blow up as the heat expands the air inside each ravioli. Don't be meticulous about this, but get as much as you can out. They don't take long to cook because they are fresh, so they shouldn't blow up too much. When they're all nice and snug inside their pasta blankets, use a pizza cutter to cut between each filling. If you want to get fancy, you can use a fork to gently press a design on the outside. Me, I skip it. There really isn't a need to get all fancy. It's just another step, and I kinda like the rough edges. It's homemade, and it should look homemade.
Now you have to worry about making sure your ravioli aren't going to dry out while you finish rolling out and sealing the rest of them. Tricky...but again, if you employ your tea towel sheet pan rig, you should be a.o.k. When you're finished with all of them (and yes, it makes a LOT), you can lay them out on a sheet pan, not overlapping, and freeze. When they're hard, bag and date them and leave in the freezer until you want to use them (for up to 3 months). To use, toss in boiling, salted water when still frozen and cook for 3-4 minutes, or until they float to the top. I usually go about a minute beyond after they float, just to make sure they're heated all the way through.
Want to cook them fresh? Now you're talking! Place them one at a time in the pot and work in batches of no more than 10. When they're finished cooking, toss them straight into that lovely red sauce you made (after blending, of course).

Isabell* and Deanna were really excited about everything we made, and it all came out really well. I even surprised myself, because you know how I feel about futzing around. This process wasn't hard, and I actually found I enjoyed it a lot. Even if you don't have the machinery, ask someone who does if you can borrow it and make it for them. They'd love it, and you wouldn't be stuck trying to eat an entire batch of fresh pasta by yourself. Not that that's a bad thing...
 Give some pasta a try. We made two batches. One for ravioli, and one for fettuccine. They were both delicious, and both totally worth it. I feel like the girls learned a lot, and that we had a blast doing it!
Enjoy your pasta! Ciao!
*Names were changed to protect the innocent! =)


I forgot to mention that we also made fettuccine pasta and cooked it with the remaining ravioli filling. I heated up a bunch of butter over the stove to make brown butter (brown, not BLACK!) and added a teaspoon of dried sage. Then I added the rest of the filling. It was good. Reminded me of stroganoff, without the meat. Nice.
ReplyDeletewhat a silly picture of me!
ReplyDeleteYou Ladies are making homemade pasta look so easy why would anyone ever buy from the bag/box again...
ReplyDeleteIt actually is super easy! I should invite you over sometime and show you how I do it. Literally, I do it exactly the way I typed it on here. Mostly, I don't do filled pasta because it's a lot of steps, but if you have a friend to help you it goes a lot faster. Then you don't have to be everywhere at once. Let me know when you want to try your hand at homemade pasta!
ReplyDeleteMaking pasta in school was one of my favorite activities. Unfortunately there aren't many opportunities for me to make it at work, as i'm stuck in the pantry. But I digress, you have inspired me to go buy myself a pasta rolling attachment for my kitchen-aid today! do i smell a possible future business relationship? =]
ReplyDeleteLIKE! =) haha
ReplyDelete